Friday, April 30, 2010

Dishwasher {MAGIC}

Sharing a BIG dishwasher tip: Dishwasher Magic.
This stuff truely is MAGIC!
I am so excited to have clean dishes! A few months back our dishwasher started to leave a film & left over food on the "clean" dishes. I've had to handwash and its not fun when you have 6 people using the dishes. We had a repair man come and he told use we have hard water and a water softener would be great ($1500.00-$2400.00-too much right now) but then he did mention to give this product a try. That was one of the best $4.00 (Walmart)we have spent! I will be doing this once a month(recommended) to keep our dishes clean!

1 Year Advice


The other day as I was going thru our wedding memorabilia I found letters of advice that I could only open 1 year after we were married. So I decided to put them in a book for safe keeping. This was a great idea my aunt had for the Bridal Shower but you could easily do this for a Baby Shower for a new mom!


1-Cut 2 pieces of fabric and 1 piece of Heat n' Bond all the same(mine measured to fit 5x7 sheets of paper).


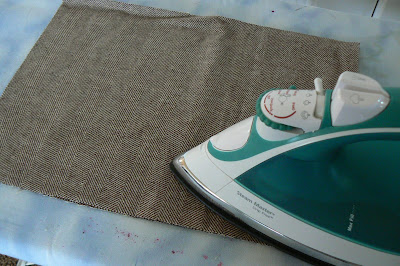
2-Iron the Heat n' Bond to one side of the fabric.


3-Remove paper sheet.


4-Put other piece of fabric on top and iron (this will give the "book cover" durability).


5-Stitch around all 4 sides. Fray the edge.


6-Stack paper on top of fabric (depending on how many letter of advice you received).


7-Tape in all the "advice" papers on each colored "page".

Now after 12 years of marriage its fun to reread the wonderful advice given and see how I have done. I will cherish these always!

Thursday, April 29, 2010

Hair Accessories Holder


I was so inspired by Angela to make some hair accessories(thanks Ang!) that I needed to make a holder for them.


1-A cupboard door (a picture frame would work also) with a beadboard insert.


2-Spray painted it black.


3-For the ribbon part: Fold a piece of fabric(4 inches in length) in 1/2 and put the ends into the middle then put the white ribbon in between them.


4-Sew around each side forming a square.


5-Glue the ribbon onto the back of the board.


6-I did a bead of glue around the edge then sprinkled it with glitter.


7-I love how the vinyl lettering came out: "I am Divine". I love what the word "divine" means. I wanted my girls to have a daily reminder that they are Divine (the pretty hair clips are just a bonus). Then in the top corners I put some hooks for the headbands. Now all I have to do is make some more hair clips to fill up the ribbons. I'm so excited. Oh, the possiblilities!

Adventures in mud

This picture does not show, except in the barest way, how muddy our hike was today. Seventeen Senior Trailblazers headed out to try a new Olsen Creek/Stewart Mountain hike that was mapped out on Tuesday by our intrepid leader Al. He wrote about it at length on a GeezerHiker post, if you want to know why we went on this particular trip. As it turned out, it was filled with adventure, not just because we hiked most of the day in deep mud, you know the sucking kind where a foot placement would leave you with an audible attempt to pull your foot back out of the deep mud.
The group was game for this hike, though, because we had been warned by the description of it being at least ten miles long and rated "hard." It was actually almost twelve miles and 2,500 feet of elevation gain and loss. Once we left the logging road (after a mile or two), we started to hike on an old horse trail that wound definitely uphill. The trail was pretty evident from the horse apples and water-filled depressions left by those horses.

By the time we got to the steepest uphill, we had a mishap: Ward took a step off the side of the hill! When I turned to see what the commotion was, I saw him falling downhill head over heels! I saw him take several complete revolutions before he came to a stop about fifty feet from the top of the trail.
Way down there amongst the trees (click to enlarge) you can see Ward climbing back up to us: no obvious injuries, and he managed to avoid hitting a tree, breaking his neck, or doing anything worse than losing his hat and water bottles, which he found on his way back up to us. Ward has now officially relinquished one of his nine lives. It is amazing that nothing happened to him, but I cannot help thinking that tomorrow he will feel some bumps and bruises.
When we stopped for lunch, we had a beautiful view of Lake Whatcom, although the view of the Twin Sisters and Mt. Baker were obscured by clouds. This was not a bad consolation prize. The rain kept away from us most of the day, and we only had the occasional sprinkle. After lunch, though, we headed down through a logging operation, which was pretty depressing. I couldn't help but think of all the birds that had built nests in the doomed trees. I won't show you any pictures of that because it was just too darned gloomy. Instead, I will leave you with a picture of the beautiful trillium flower, three petals, three leaves, and only visible for a short while in the springtime in these parts.
At the end of the hike, we had a little confusion about where the parking lot was, but we were so tired that when we finally reunited, we dragged ourselves back to our respective cars, drove back to the Senior Center, and hobbled to our homes. And of course I wanted to share with all of you the muddy adventures, so here you are!
:-)

Wednesday, April 28, 2010

Our digital age

It's really rather amazing how much things have changed in just a few short years. I realized, while reading the blogs that I follow, how dependent we are on our digital cameras for our pictures.

It made me become conscious of the huge shifts that are taking place in the world of cameras. Many companies like Kodak, Polaroid, Fujifilm, all the rest of them, are no longer making film! We have shifted, and in a very rapid fashion, from film-based to digital photography. This picture shows the camera I now use (well, mine has 9 megapixels but otherwise is the same) for all my pictures, and what has really changed for me is the immediacy of my results. When I go out hiking with the Seniors, I snap probably fifty pictures and take several of the same scene. Then in the car on the way back to the Senior Center, I go through them and remove probably a dozen, keeping the ones I know I will take a closer look at. By the time I've come home and transferred them to my Mac, I go through them again and edit out maybe another half a dozen. I export some in a smaller format to the desktop and compose my post. The full-sized pictures that I think are pretty good go onto my Flickr site, usually around 12-15.

This is completely different from the days of the film camera. I would buy film for a particular event, usually for outdoors, take the pictures, and if I would be really anxious to see them, take the film to a one-hour photo store to get them developed. If I wanted to use any of them for the internet, I had to scan them in. What a huge difference in process! And of course, most of the time I wouldn't have any particular place to put them on line, because the blogosphere didn't exist back then.

Remember the phrase, "a Kodak moment"? I do. I read this article today about how Kodak is wanting to bring back the moment, about "the REAL Kodak moment is when you share." Frankly, though, the whole moment could only emerge when all the parts had been created and put in place. That moment is here now.
:-)

Tuesday, April 27, 2010

Girl with the Dragon Tattoo

I went to the movies tonight with my friend Judy at the local art theater, the Pickford, to see the movie, The Girl with the Dragon Tattoo. This was an exceptional film, one I highly recommend, if you are willing to see a Swedish movie with subtitles, one that will keep you on the edge of your seat until the very end!

The movie is made from the first of a trilogy of novels written by Steig Larsson, a Swedish journalist who wrote three novels about these characters before his death in 2004, which were unpublished at that time but now have become best sellers. The three movies were also made in Sweden and star Michael Nyqvist as Mikael Blomkvist and Noomi Rapace as Lisbeth Salander, the two main characters. I understand that the next two films also feature the two in them, and I can only say that they are brilliant in these roles.

I especially loved the character of Lisbeth, a brilliant Goth-type young woman who is incredibly talented and bright and who was mistreated in her early years but finds ways to make her torturers pay that were very satisfying, especially after watching her suffer so terribly at their hands. The movie did have some very difficult parts to watch, but I have to say they were all worth it. By the time I was at the end of the movie, I can hardly wait to see the next two movies, as I am sure they will just carry these characters forward a little further in their lives.

I understand that this film earned a very favorable Rotten Tomatoes rating (85% fresh, this link will take you to the latest reviews of the movie). I must say I enjoyed it thoroughly, although now that I've seen it once, I think I would enjoy it much more on a second viewing, since the suspense, which is totally convincing, would be much easier to bear knowing the outcome. If you see it, let me know what you think!
:-)

Sewing Machine Cover


I got a new Sewing machine for Christmas so I finally got a cover made for it. I am born from a family of sowers. This was a really good piece of advice that my mom gave to me regarding sewing. It was to make sure the machine was always covered so the dust doesn't get into the machine to ruin it. Thanks Mom!


1-I looked at this one and realized a simple hand towel from Walmart would do{only $2.50}. I love brown and stripes so this one was perfect!


2-Cut your desired ribbon 12 inches in length x4.


3-Measure 5 inches from the bottom and sew on the ribbon.


4-I just attached a bead at the end of the ribbon so it doesn't fray{& so it looks even that much cuter}.


5-I also did a matching one for my Cricket.

Monday, April 26, 2010

Eagle watch

See the Web Cam!
I have been anxiously watching Mom and Dad Hornby Eagle with their latest eggs. They are due to hatch any day now, both laid within four days of each other, with one due on the 26th and the other due on the 30th. They can come within a week of those dates.

It's possible that they will not hatch, because these two eagles have been in this nest for many years and might be getting too old to have viable chicks. They are in their late twenties, maybe around 27 years of age! They have fledged at least 18 eaglets. I did just find out that their two eggs last year both hatched, however.

The dedication and diligence that they have put into taking care of these eggs has been really touching to watch, and I'm hoping that I'm going to see at least one little eaglet emerge. I've put a link under the picture to the web cam I watch. If you join the chat room, I'm there some of the time.

Right now when I look at the cam, I know these eagles well enough to tell which is Mom and which is Dad. At this moment right now, Dad is on the nest. He's got a smoother head and is smaller overall. Mom has a much shaggier head than Dad, and from some angles it's quite easy to tell who's who.

But for now, I've got my fingers crossed that the eaglets will make it. And when I see the impressive and very gentle way they take care of these eggs, I am filled with wonder and awe at the way it all works.
:-)

Ang's Flower Clip Tutorial


Flower clips are very easy to make! However, done right they can be a little more time-consuming than they look (maybe only for ME because I'm an extreme perfectionist). I've made them to sell in the past, but the price is never equal to the time I put into them.

So I make them for my daughters, as gifts for my nieces, as baby gifts for friends; and of course my daughters' friends [and moms] anticipate them at their birthday parties!

Here is how I make my flower clips!...


What you will need:

Alligator Clips (I like the 2" single prong clips)

Silk Flowers (Where ever you can find them. Various craft stores, Walmart, or even the dollar store!)

3/8" Ribbon (Craft/Fabric stores or Walmart. I like the grossgrain ribbon best.)

Fray Check (Found in the "Sewing Notions" section)

Glue Gun and Hot-Glue sticks

Craft/Fabric Scissors

Jewels, Buttons, Etc. (Craft stores)

What you will DO:

1- Cut 4" of ribbon, and gently wet each end with Fray Check. Set aside to dry.

2- Pull flower off plastic stem, then pull off all plastic parts (so you are left with just the pedals).


*Discard all the plastic parts; unless you like the middle, in which case you would just snip off the remaining stem and set aside to glue back onto the top.

*Steps 1 & 2 are significant in keeping the flower- (esp. a gerber daisy)- flat for glueing to the clip.

3- Starting at the bottom layer, glue each layer of flower pedals back together.

4- Glue on a jewel and/or button on the top/center of flower (or use original center if you prefer). Set finished flower aside.

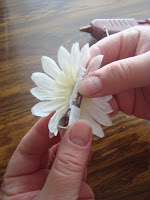
5- (Have clip ready!) Take the 4" ribbon and apply hot-glue to half. Quickly put glue gun down and grab the clip, pinching it open. slide the ribbon onto the under-side of the top of clip and press to adhere.

6- Finish glueing on top, fold and press the ribbon down quickly. Then turn clip over and glue a little hot-glue to back, pressing ribbon over that.


7- Turn flower over and glue clip (ribbon-covered side) to back/bottom of flower. YOU'RE DONE! Enjoy your cute flower clip!

MY EXTRA TIPS and SECRETS...
*Spray Scotch Guard onto finished flower clip for extra protection against dirt and dinge.

*Add some "grip" to the clip by hot-glueing some cupboard liner to the under-side (over the ribbon).

*Do not store flower clips in a drawer! Clip them to a long piece of ribbon that you hang from the wall. This will #1, keep them from getting frumpy and #2, organize them nicely for easy finding!

*To clean, wipe with damp cloth. Or you can carefully rinse in slightly soapy water and lay flat to dry.

**Coming soon... My own Creative Homemaker Etsy shop!! It will have hair-clip organizers, as well as DIY kits for flower clips. Stay tuned, and I will post about it as soon as I get it going!!**
 

KENJI Sponsored by KENJI